DOGBONE
DOGBONE
  • Home
  • Products
  • Set Up Instructions
    • Dogbone 3.0 Set Up
    • K9 Swivel Upgrade Set Up
  • About Us
  • Contact Us
  • More
    • Home
    • Products
    • Set Up Instructions
      • Dogbone 3.0 Set Up
      • K9 Swivel Upgrade Set Up
    • About Us
    • Contact Us
  • Sign In
  • Create Account

  • Orders
  • My Account
  • Signed in as:

  • filler@godaddy.com


  • Orders
  • My Account
  • Sign out

Get Support Fast

Signed in as:

filler@godaddy.com

  • Home
  • Products
  • Set Up Instructions
    • Dogbone 3.0 Set Up
    • K9 Swivel Upgrade Set Up
  • About Us
  • Contact Us

Account

  • Orders
  • My Account
  • Sign out

  • Sign In
  • Orders
  • My Account
Get Support Fast

K9 SWIVEL UPGRADE Set UP INstructions

Open the Package

Preparing Your Swivel For K9 Upgrade

Preparing Your Swivel For K9 Upgrade

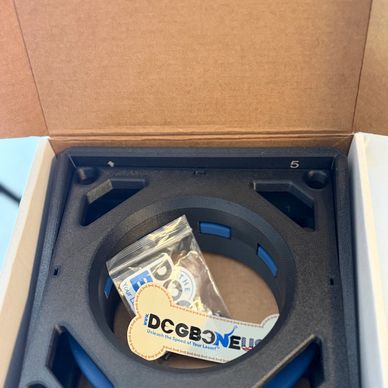
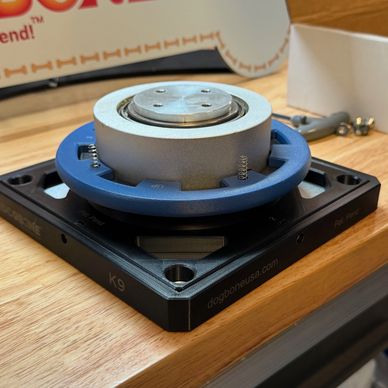
Thank you for purchasing the K9 Swivel by Dogbone USA! Remove the components and take an inventory of parts. 


There is an extra M3x10mm capped screw, stainless steel spring, and square nut.

Preparing Your Swivel For K9 Upgrade

Preparing Your Swivel For K9 Upgrade

Preparing Your Swivel For K9 Upgrade

K9 Swivel

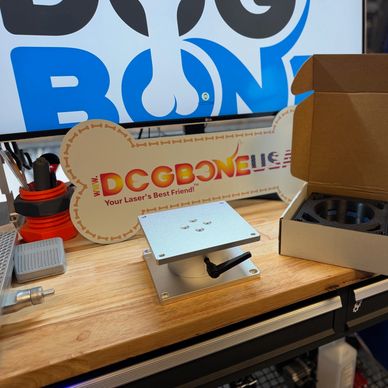
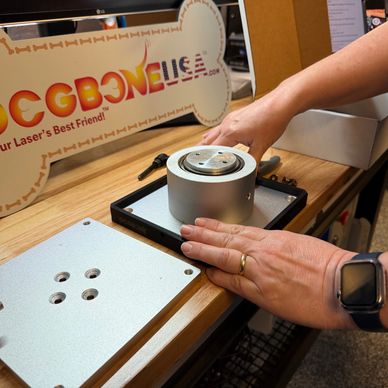
Place the swivel in the orientation shown above with the swivel top up. 

Remove the Top of Your Swivel

Preparing Your Swivel For K9 Upgrade

Remove the Adjustable Clamping Lever

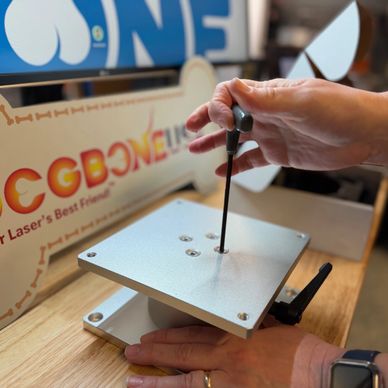
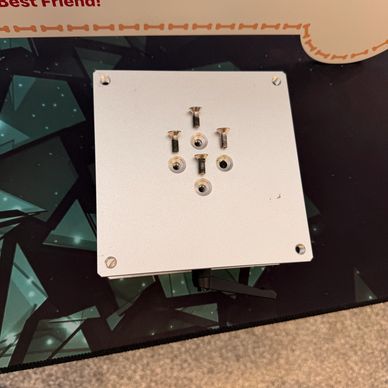
You will need to use the appropriate tool (e.g. Allen key) which is not included to remove the four (4) screws.


Remove the four (4) screws and set aside for reinstall.


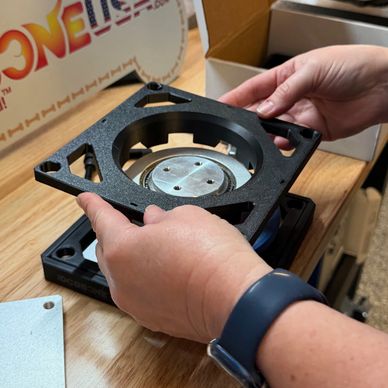
Remove the top of your swivel and set aside for reinstall.

Remove the Adjustable Clamping Lever

Remove the Adjustable Clamping Lever

Remove the Adjustable Clamping Lever

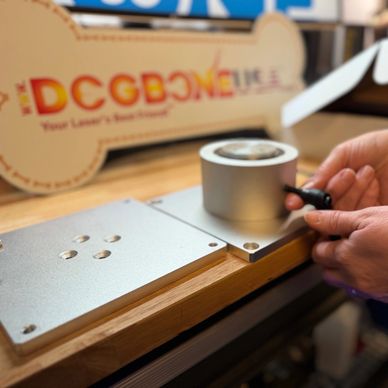
Remove the adjustable clamping lever (no longer needed) on the side of the swivel to allow for free rotation of the swivel.

Inserting the M3 Square Nuts

Remove the Adjustable Clamping Lever

Inserting the M3 Square Nuts

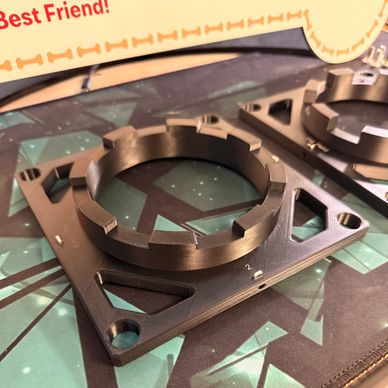
There are a total of eight (8) M3 square nuts you will insert into each of the rectangular slots in Parts 2 & 4. Each part has four (4) rectangular slots, one on each side.


Use caution when inserting each M3 nut as you may need to use a tool to seat it fully in the slot. 


-Make sure that threads are aligned with the holes on the side associated with it. 

Installing Part 1

Remove the Adjustable Clamping Lever

Inserting the M3 Square Nuts

Slide Part 1 over the bottom edges of the swivel.


Make sure the arrow engraved on the inside points "UP." 

Installing Part 2

Installing the Springs

Installing Part 2

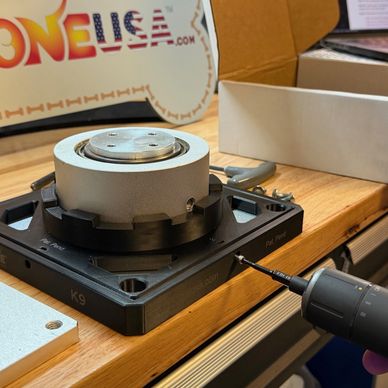
Place Part 2 over the swivel column and inside Part 1. You will secure Part 1 & 2 together with provided M3X10MM screws on each of the four (4) edges into the M3 nuts you previously installed. 

Installing Part 3

Installing the Springs

Installing Part 2

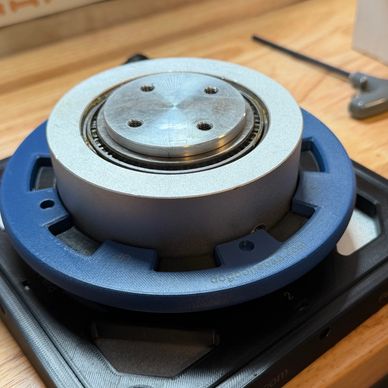
Place Part 3 over the swivel column, align the teeth to Part 2 and push down.


Make sure the word "UP" faces up.

Installing the Springs

Installing the Springs

Installing the Springs

Place one (1) stainless steel spring into each of the 4 holes in Part 3 as shown in the photo above.

Installing Part 4

Reinstalling the Swivel Top

Installing the Springs

Place Part 4 over the swivel column and align the holes with the springs.


Make sure that all the springs are in the holes.

Make sure no springs have fallen out.

Make sure the world "DOWN" faces down.

Reinstalling the Swivel Top

Reinstalling the Swivel Top

Reinstalling the Swivel Top

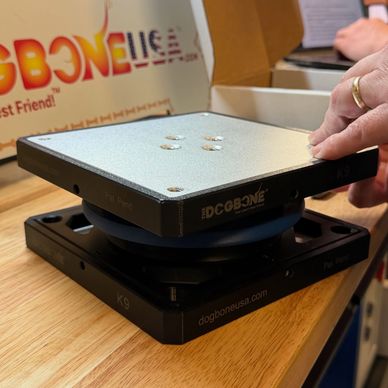
Place the swivel top on the swivel and secure it with the four (4) previously removed screws.

Installing Part 5

Reinstalling the Swivel Top

Reinstalling the Swivel Top

Place Part 5 over the swivel edges and the edges of Part 4.


Make sure the arrow points UP.

Make sure Part 5 is flush to the top of the swivel.


Secure Parts 4 & 5 together with M3x10mm screws on each of the four (4) edges.

TeST and INSTALL THE K9 UPGRADED SWIVEL

Testing the Swivel Upgrade

Align Your Laser and Use with Caution

Testing the Swivel Upgrade

Pull the blue ring (Part 3) up and ensure that the swivel can rotate and lock in each slot. 

Mount Swivel

Align Your Laser and Use with Caution

Testing the Swivel Upgrade

Using your laser and swivel manufacturer's instructions install your swivel with the K9 Swivel Upgrade. 


Align Your Laser and Use with Caution

Align Your Laser and Use with Caution

Align Your Laser and Use with Caution

A close-up of a Dogbone laser engraving machine on a workbench.

Follow all safety precautions provided to you by your swivel and laser manufacturer. 


You are responsible for your safety and your equipment when using the K9 Swivel Upgrade. 


  • Terms and Policy
  • Contact Us

The Dogbone USA

Summerville, SC

sales@dogboneusa.com

Copyright © 2026 Perfectly Designed LLC. All images, designs, and intellectual property (including patent-pending and patented designs) are owned exclusively by Perfectly Designed LLC. All rights reserved.

Powered by

This website uses cookies.

We use cookies to analyze website traffic and optimize your website experience. By accepting our use of cookies, your data will be aggregated with all other user data.

Accept